Tuesday, September 30, 2014

Creamed Chicken

I love Creamed Chicken, it is one of my all time favorite meals. I like it on mashed potatoes, biscuits, noodles, or shoved in a pie crust. The restaurant I used to work at had some of the best cream chicken I have ever had. Unfortunately, mine isn't as good, but some things are hard to replicate. Although, mine still is pretty darn tasty. It is so simple to make. I used to spend a lot of time buying all the fresh veggies, cleaning, and chopping them up.  I love all the different veggies in this, unfortunately, Lucinda doesn't like lima beans, so I have to leave them out. Now, I buy the steam fresh frozen veggies. Winning idea! 

For this recipe, make sure you have a really good chicken broth. If I don't have any homemade on hand, I use Swansons. I think it has a really good flavor. We used to be a College Inn broth family, until Costco didn't have it in stock and we grabbed some Swansons. Haven't looked back since. If you want to use fresh veggies, it is still easy to do, just takes a little more prep work. If you need this done fast, you'll want to take 1/4 cup of broth and mix it with 2 tablespoons of cornstarch to thicken it. If you have some time on your hands, you can just let it cook down for about an hour and it thickens on it's own. Either way, you  will have a delicious meal. 

Creamed Chicken:
1 bag Steam Fresh Veggies (carrots, peas, green beans, corn)
            -----or-----
      fresh veggies chopped up
1 can chicken broth
1 can cream of chicken soup
2-3 chicken breasts shredded
1/2 cup mild cheddar cheese
2 teaspoons garlic powder
1 teaspoon black pepper
2 tablespoons cornstarch

Mix all the ingredients together EXCEPT the cornstarch and 1/4 cup broth in a large pan. Simmer for about half an hour and add mixed cornstarch and broth. If not using cornstarch, simmer for an hour, occasionally stirring. Serve with whichever sides your family likes. Enjoy!


Thursday, September 25, 2014

Easy Deviled Eggs

One of my favorite recipes of my mom's is deviled eggs. They are also a family favorite. When I was little, I thought we could only have these when it was a holiday, since that is the only time Lucinda made them. They are actually super easy and even Lucinda has said that mine taste just like hers (big compliment from the boss lady!). For this recipe is it really better if you use Miracle Whip instead of mayo. The flavors really are different, and Miracle Whip gives this a nice tang.


Start out by boiling 12 eggs. I time them 13 minutes from the time a rolling boil begins. When 13 minutes has passed, I dump the hot water and immediately place the eggs in ice water. Let them cool at least 30 minutes, or place them in the fridge and use the next day. Peel the eggs and slice in half placing the yolks in a separate bowl. Once all the yolks are separated from the whites, take a fork and mash the yolks into fine pieces. Add in miracle whip, yellow mustard, sweet relish, and pepper. To mix it all, I really like to use the Kitchenaid mixer or even a hand mixer. Spoon the yolk mixture back into the egg halves. If you want to be fancy, use a large star tip for cake decorating, but make sure the yolk doesn't have large pieces, or it will clog the tip. Sprinkle on some smoked paprika and you're done!

Deviled Eggs
12 boiled eggs
1 cup Miracle Whip
2 tablespoons yellow mustard
1 tablespoon sweet relish
1/2 teaspoon black pepper
smoked paprika

Meatballs


I love meatballs. Well... I take that back, I love meatballs that are loaded with flavor.Don't you just hate getting a random ball of burger that is dry with absolutely no taste? Meatballs are actually so easy to make. Even better, they can be made ahead of time and frozen for later use. You know, when you're already having a rushed day, the traffic is slow, and you need to get a meal on the table. These meatballs will be a hit in your house! 

Lately, I've been busy studying for my upcoming boards (and hardcore freaking out), so I haven't wanted to cook. I've heard a lot of the "What's for dinner?" question lately and I thought meatball sandwiches would be nice and easy. Plus, the leftovers would be great for rigatoni and meatballs the next day. Win-win situation! Then I began thinking, if I made a whole bunch, I could vacuum pack them for later use. Hope you enjoy!


I use a 2:1 ratio of ground chuck and ground pork, it adds a little something extra. If you don't want the ground pork, you don't have to use it. To make rolling the balls easier, take a medium sized ice cream scoop to make nice uniform balls. I've even used a small cokkie dough scoop to make cocktail meatballs. Save SOOOOO much time. 

Bake at 350 degrees for 35 minutes

Blot off the grease
I spread aluminum foil on my pans for easy cleanup. Bake at 350 degrees for 35 minutes. As soon as they come out, blot the excess grease off on paper towels. Throw them in a pot of sauce or freeze them for later use. 

MMMM
Meatballs:
2 pounds ground chuck
1 pound ground pork
2 eggs
1.5 cups Italian Seasoned bread crumbs
1 cup parmesan cheese
2 tablespoons italian seasoning
1/2 small onion minced
5-6 garlic cloves minced
2 tablespoons milk

Mix all ingredients together, form into balls, and bake


Ribs

I love to use my smoker, I think its a pretty cool machine. With this rib recipe, you can use a smoker if you have one, or you can also bake these in the oven, Either way, you end up with tender, fall-off-the-bone ribs. Get a good rub for the rack and a tasty BBQ sauce, and you're good to go! I really like to use cherry wood in my smoker. It seems to give almost everything I've smoked a really good smoky taste. I even like apple wood for pork. For this rack of ribs, I used apple, cherry, and some hickory briquettes the Manfriend found for me. 

I really prefer to rub the meat down the night before and let it sit in the fridge over night, however, you can put in on the day of cooking and its still really good. Just make sure if you are preparing the rack the night before, you really wrap it up well so it doesn't leak in the fridge. I use my own rib rub, I'll post the ingredients for that as well. 


The finished rack. Looks delish!

To start, I cover both sides of the rack with my Spicy Brown Sugar Rub. Work it into the meat fairly well, and as more as needed. You really want a nice thick layer of rub on the meat. If you're doing this the night before, cover in foil and plastic wrap. If you are doing this the day of, after you finish getting the rub on, go start the smoker. 


After the first layer of rub, I added more on after this picture

I actually like to take 3-4 sheets of heavy duty foil and pull up the sides to make an almost boat around the rack. I like to keep the rib in it's own juices during smoking.
 
About 1 hour into smoking
You can use any cut of rib you like, today I just had a standard pork spare rib rack (it was on sale). Use your preference, they are all good!

At around the 2 hour mark, I started adding these nifty little hickory briquettes to the smoker. I added about 7 every hour for the next 2 hours. 

These are pretty cool! Big thanks to the Manfriend
The ribs will really start to look good, and smell wonderful!! You'll start to see the meat pulling back from the bone and this is a good sign! 

Can you say yum?!?
When my ribs start to look like this, I take a large sheet of foil and I tent it over the top. You may like your ribs to get a little darker, but this is how I like mine to look.

About 4.5 hours after I put my ribs in, I like to start adding my BBQ sauce. I've made my own before, and also have used store bought. It's really up to you. I pull them off of the smoker right around hour 5. Get some of your favorite sides, and you're good to go!

Spicy Brown Sugar Rub:
2 cups light brown sugar
2 tablespoons garlic powder
2 teaspoons onion salt
2 teaspoons cayenne pepper (adjust to your liking)
1 tablespoon smoked paprika
1 teaspoon black pepper

Ribs:
1-2 racks of your choice ribs
rub of your choice
BBQ sauce
smoker between 300-325 degrees


Tuesday, September 9, 2014

Chicken Cacciatore

I love Chicken Cacciatore. It's good by itself, over pasta or rice, but my favorite way is to eat it over mashed potatoes. This is an easy dish to make. I've made it by using rotisserie chicken, whole chicken breasts, and chicken tenderloins. A lot of recipes call for chicken thighs, but I don't like the dark meat. This dish is even good without the meat for a vegetarian dish.
 
I read a long time ago that Cacciatore means "hunter" in Italian. Traditionally it has been made with either chicken or rabbit. While I like a traditional cacciatore, I have modified mine to my taste. It's filled with chunks of tomato and bell pepper, rough chopped sweet onion, thick slices of mushroom, garlic (of course!), and chicken. Serve it over some mashed potatoes or some hot noodles with some garlic bread, and its a heck of a meal. 

The finished product
Start by rough chopping a small sweet onion, a large green pepper, and 8-12 ounces of fresh mushrooms (canned are fine also, just drain them). Finely chop 4 garlic cloves.


Put in a large pot with some olive oil and cook on medium-high heat for about 10-15 minutes. Add 2 teaspoons of Italian seasoning, 1 teaspoon of hot red pepper flakes, and 1/2 a teaspoon of fresh ground black pepper. Stir and then add in 3 cans of diced tomatoes and 1 can of tomato sauce. 

Cook for 10-115 minutes until slightly softened


Let simmer on low to medium heat. At this point, you are able to put raw chicken in and cook it in the sauce, but I like to cook mine separately and shred it before adding. Once the chicken is in, simmer for about an hour and a half on low heat. Stir occasionally to avoid burning. 

Before the chicken, isn't it pretty?
Chicken Cacciatore:
1 large green pepper chopped
1 small sweet onion chopped
8-12 ounces mushrooms sliced 
4 cloves garlic finely minced
1 tablespoon olive oil
2 teaspoons Italian seasoning
1 teaspoon hot red pepper flakes
1/2 teaspoon fresh ground pepper
3 cans diced tomatoes
1 can tomato sauce
        Either:
3 chicken breasts  -or-
6-8 tenderloins  -or-
rotisserie chicken


Friday, September 5, 2014

Fried Zucchini, Yellow Squash, and Fried Green Tomatoes


Since the Manfriend has been supplying me with tons of zucchini and yellow squash, I finally had some time to deep-fry some of them. They are so delicious with a light breading. Add in some marinara or some homemade ranch dressing, and its bliss. I may live in Ohio, but sometimes I swear I have a little bit of Southern girl in me. I love Fried Green Tomatoes, and not just the movie! The Manfriend's mom is where I first my first taste of a fried green tomato. Add a little bit of salt, and it is heaven. So I figured, while I was frying up the squash, I might as well add in some tomatoes as well. This is another easy recipe, a little messy, but easy nonetheless.

Start out by cutting up your veggies fairly thin If you have a mandolin, it makes it even easier to cut, just watch your fingers! About 13 years ago, I was using a mandolin to slice up onions and I didn't have the guard on and almost sliced the top of my pinky off. Luckily, it healed up fine and I even regained feeling in the tip. Lesson learned, use the guard! You can either slice up the squash to make disks, or go lengthwise and make planks.

Look at those colors!
Planks are just as good
Once everything is sliced, take 3 shallow bowls and line them up. If you are making the planks, you should probably use 3 smaller rectangular shaped pans. In the first bowl add some flour. The middle bowl, whisk 2 eggs and add about 1.5 cups milk or water and mix. In the last bowl, use some seasoned cracker meal, fry magic, or bread crumbs, your preference. Today, I was using the cracker meal.

Cracker meal, egg wash, flour
Dredge the veggies in the flour first, this gives the egg wash something to hold on to. Then dip it quickly in the egg wash. Put the coated veggie in the cracker meal. I do a few and lay them on a plate, that way when I put them in the fryer, I have a few to go in at once. 

Ready for the fryer
If you don't want to use the deep-fryer, you can do this on the stovetop with a deep pan with about an inch of oil on medium-high heat. Cook a few minutes until both sides are golden brown. Remove with tongs and place on some paper towels to absorb the excess oil. Continue coating the veggies and frying them up until its all cooked. If you're making a large quantity, you can place them on a pan in a 200 degree oven to keep them nice and warm until you serve them. 

This method is also really good to make Eggplant Parmesan. Just heat up some noodles and serve with some spaghetti sauce. I like to add a sprinkling of parmesan cheese to the zucchini and yellow squash. 

Fried Green Tomatoes, Zucchini, and Yellow Squash
1 Zucchini sliced thin
1 Yellow Squash sliced thin
1 Firm Green Tomato sliced thin
2 eggs
1.5 cups milk or water
Cracker meal, fry magic, or bread crumbs
Heat deep-fryer to 325 degrees or use large pan with an inch oil on medium-high heat.


Thursday, September 4, 2014

Very Veggie Homemade Spaghetti Sauce

Here is the recipe I made with my 3rd roaster of sauce. I love veggies, always have, always will. 2 years ago, I had lost about 45 pounds< i was in clothes I hadn't worn in forever, got rid of all of my "fat" clothes and felt great. Then I started nursing school. Anyone that has gone through nursing will probably agree that you tend to get a little heavier. I got 40 pounds heavier, definitely not proud of that. Thankfully, since I've graduated, the pounds have been coming off. Even though I'm still studying for boards, I haven't been reaching for the m&m's. 

I actually do like to eat healthy, and since the Manfriend has been giving me produce left and right, I've had to find ways to use it all. This recipe is great for anyone that likes a lot of veggies, or just wants to get veggies into their family without them knowing. Use a food processor, and you can pretty much make anything small enough where it can't be detected. Delicious? Yes. Sneaky? Of course! 

As I've said before, I love garlic. I used 3 bulbs in my roaster and I know that seems like a lot. You definitely don't have to use as much as I did, its really a personal preference. In fact, any of these extra added veggies can be added or subtracted to your liking. Once again, the beauty of cooking is that it can be changed around!

You're going to start off with the Original Homemade Sauce recipe and then just add to it.

Very Veggie Homemade Spaghetti Sauce:
25-28 pounds tomatoes
2 cups sugar
2 cups olive oil or vegetable oil
1/2 cup salt
1 tablespoon dried oregano
1 tablespoon dried basil (or handful of fresh chopped)
3  12 ounce cans tomato paste
4 onions finely chopped
4 green peppers finely chopped
1 cup lemon juice
            Now for the fun
3 bulbs garlic finely chopped
4 sweet banana peppers finely chopped
2 small yellow squash finely chopped
1 zucchini finely chopped
3 carrots finely chopped
8-10 tomatoes peeled and coarsely chopped
2 pounds mushrooms sliced (optional)

Make sure if you use the zucchini and/or yellow squash, you place place them in a strainer after being processed for at least 20 minutes to drain the liquid away. Add everything to the roaster and stir. Simmer at 225 for at least 3 hours. 

This sauce will be chunkier since we are using the extra coarse chopped tomatoes. If you don't like a chunky sauce, you can just leave those out. Just make sure you process all of the extra veggies very fine in the food processor. I cooked this sauce about a half an hour longer than the Original Sauce because of the liquid you get from the yellow squash and zucchini, even though I drained it prior to adding it. If there are other veggies you like, feel free to add them. Now you have a wonderful sauce, that is jam packed with all the nutrients of the veggies. The best thing is, if you have picky eaters, they won't know any different. If I hadn't added the extra garlic, my family wouldn't have known any different!

For canning, do the same things as you would for the original. 

Around the 2.5 hours mark, start getting your canning supplies ready. Boil your canning jars to sterilize them. In a small pan, have your lids in simmering water. I like to place all my jars in the dishwasher and wash them and use the sanitize button to get them ready, just be careful handling the hot jars. 

Fill the jars until you have about an 1/2-inch of head space, wipe off the lip with a wet washcloth, place the lid on and screw the ring on until finger-tight. CAREFULLY place the jars in a canner with boiling water, make sure there is at least an inch of water covering the top of the jar. Process the jars in a full rolling boil for 45 minutes for quarts and 35 minutes with pints.

CAREFULLY remove the jars and place on a cooling rack or a towel. Let them cool overnight, you'll hear the lids popping as they seal. After 12 hours, if there are any that haven't sealed, either reprocess or refrigerate and use immediately.

Label the jars and store them out of sunlight. 


Original Homemade Canned Spaghetti Sauce

One of the best things about late summer is when the fresh produce starts to become available. To me, there is nothing better than a big, juicy tomato fresh out of the garden. Normally, I plant around 200 tomato plants, a whole flat of sweet banana peppers, 12 cucumber, and 6 zucchini. This year there just wasn't time for all that with trying to finish up nursing school, so the garden was reduced down to about 48 tomato, 8 sweet banana, 3 zucchini, and 6 cucumber plants. I usually plant tomatoes that can be made into sauce, but this year I didn't, I figured we wouldn't can, so it was ok. Well, the Manfriend went to Marietta, Ohio to get tomatoes so he and his mom could tomatoes to freeze for winter use when all the stores have those flavorless hothouse tomatoes. He was sweet enough to bring me back close to 80 pounds of cooking tomatoes. Yes, thats right, 80 pounds. What in the world was I going to do with 80 pounds of tomatoes?!? Homemade spaghetti sauce of course!! Canning has really become a lost art. Yes, it is time consuming and you do have to be careful, but it is worth it in the end. After all, how easy is it after a long, busy day to boil some noodles and heat a jar of sauce? You have a wonderful homecooked meal in the time it takes to boil the noodles. 


Normally, we can around 60 quarts of spaghetti sauce during harvest. I knew I wouldn't get quite that much, but its ok since we still have a good bit left over from last year. Since we do large quantities of sauce at a time, we have a food strainer system. It is so handy! Tomatoes go in the top, turn the hand crank while pushing on the tomatoes, strained tomato sauce comes out of one side, and seeds, core, and skin all come out another side. This one is a newer model. Don't mind the packaging, we've had this a few years and it gets used! I remember being a little kid and my parents and grandparents using a very old metal version of this one. 


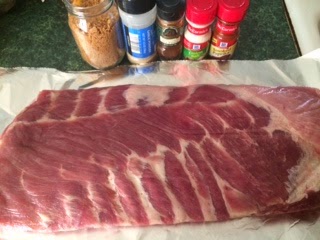
If you don't have one of these handy little gadgets, you'll have to go the old fashioned route of placing the tomatoes in a big pot of boiling water for one to two minutes. You don't want to cook the tomatoes, so don't leave them in the water longer than 2 minutes. Immediately take them out with a slotted spoon and plunge them into a big bowl, or even sinkful, of ice water. Take the core out, and the skin should peel right off. Chop the tomatoes coarsely and add them to a pot over medium-high heat and crush/stir the tomatoes. If you're serious about canning, you may want to invest in a food strainer. 

One of 3 boxes of tomatoes

Place tomatoes in the top

Sauce in one bowl, waste in another

Roughly 25 pounds of tomatoes in a 10 Liter bowl

80 pounds of tomatoes made a little over 30 liters of sauce
For the cooking stage, I use larger roaster pans. One bowl of sauce (10 liters) into one roaster pan. The day I made sauce, I had 3 roasters simmering. My house smelled delicious! I did 2 versions of sauce. 2 roasters were filled with my parent's recipe, and the remaining roaster I did my own recipe, which I'll post after this one.

One of 3 roasters with sauce simmering

Sophie's favorite spot when I'm cooking
Spaghetti Sauce:
25-28 pounds tomatoes
2 cups sugar
2 cups olive oil or vegetable oil (your preference)
1/2 cup salt
1 tablespoon dried oregano
1 tablespoon dried basil (I had fresh, so I used a handful of leaves chopped)
3  12 ounce can tomato paste
4 onion finely chopped
4 green pepper finely chopped
1 bulb garlic minced
1 cup lemon juice
Roaster set to 225, stir occasionally to avoid scorching. Simmer 2.5 hours
  
I use a food processor to chop the onions, peppers, garlic, and any fresh herbs. The easiest way I've found to make this is to put all the ingredients except the tomato sauce in the roaster pan and stir it all together first, this way the tomato paste is smoothed out and isn't lumpy. Then add the tomato sauce and stir together. I know that it seems like you're using a lot of onion and pepper, but trust me, it is fine. The sauce will also be very watery at first. It really is a must that you cook it at least 2.5 hours so it can cook down and thicken up. I know the lemon juice seems odd, but trust me, you will not taste it. Even though the sauce is acidic, you want the lemon juice to make sure the sauce will be safe to eat. We've made the sauce many times and didn't add the lemon juice, and nothing bad has happened, but I'll play it safe.

Around the 2 hours mark, start getting your canning supplies ready. Boil your canning jars to sterilize them. In a small pan, have your lids in simmering water. I like to place all my jars in the dishwasher and wash them and use the sanitize button to get them ready, just be careful handling the hot jars. 

Fill the jars until you have about an 1/2-inch of head space, wipe off the lip with a wet washcloth, place the lid on and screw the ring on until finger-tight. CAREFULLY place the jars in a canner with boiling water, make sure there is at least an inch of water covering the top of the jar. Process the jars in a full rolling boil for 45 minutes for quarts and 35 minutes with pints.

CAREFULLY remove the jars and place on a cooling rack or a towel. Let them cool overnight, you'll hear the lids popping as they seal. After 12 hours, if there are any that haven't sealed, either reprocess or refrigerate and use immediately.

Label the jars and store them out of sunlight. 

I won't lie, it is a lot of work to do, but it is so rewarding in the end. Hope you enjoy!!